Appearance
SpringBoot项目打包成war包
说明
- Springboot 项目,默认是打包成jar包。
- 国产化只能使用东方通中间件部署,因此必须打包成 war 包。
- 打war包后,使用 tomcat 部署测试。
核心代码拷贝
1. 拷贝 core 和 component 模块
使用脚手架的话,没有 core 和 component 两个模块,如下图所示
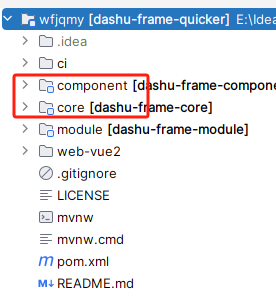
需要从仓库中拷贝到本项目中。 因为:有些pom依赖,必须在核心代码快中修改。
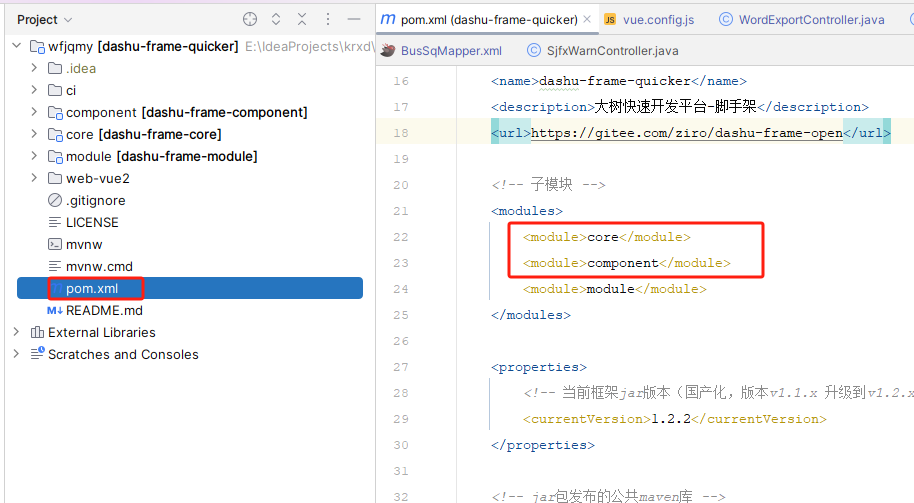
2. 修改 pom.xml
父级pom.xml中,添加模块,如下图所示:
修改 core 模块的 pom.xml 中的父级版本号等信息,如下图所示:
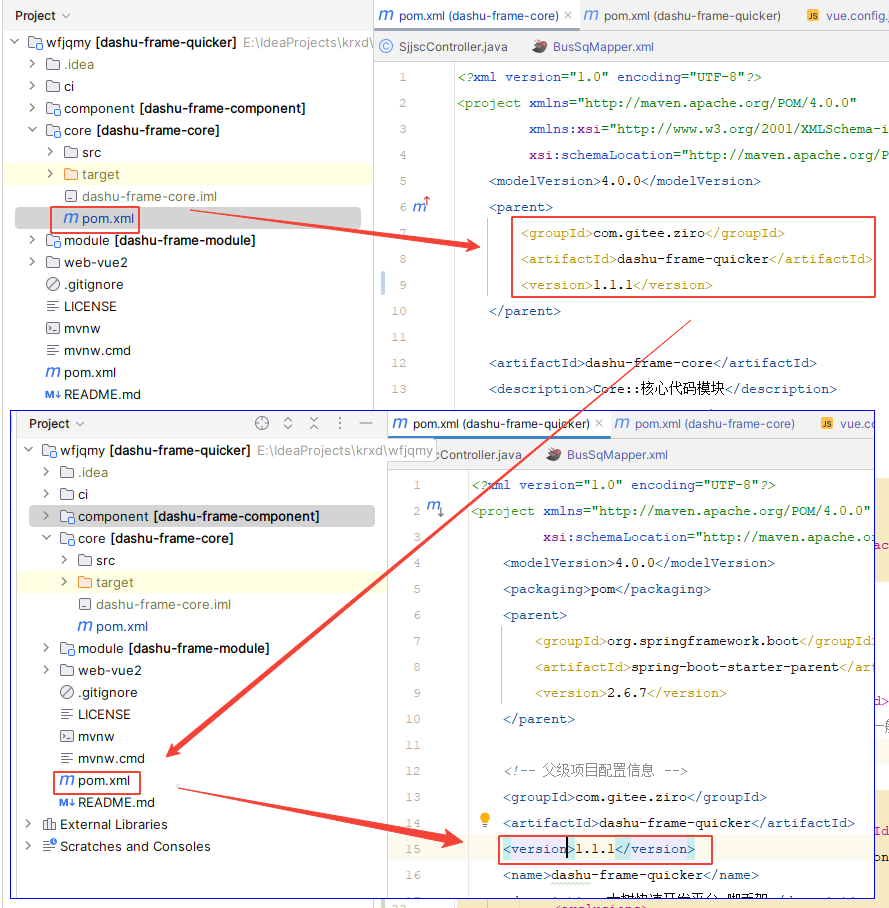
修改 component 模块的 pom.xml 中的父级版本号等信息,同上。
打WAR包
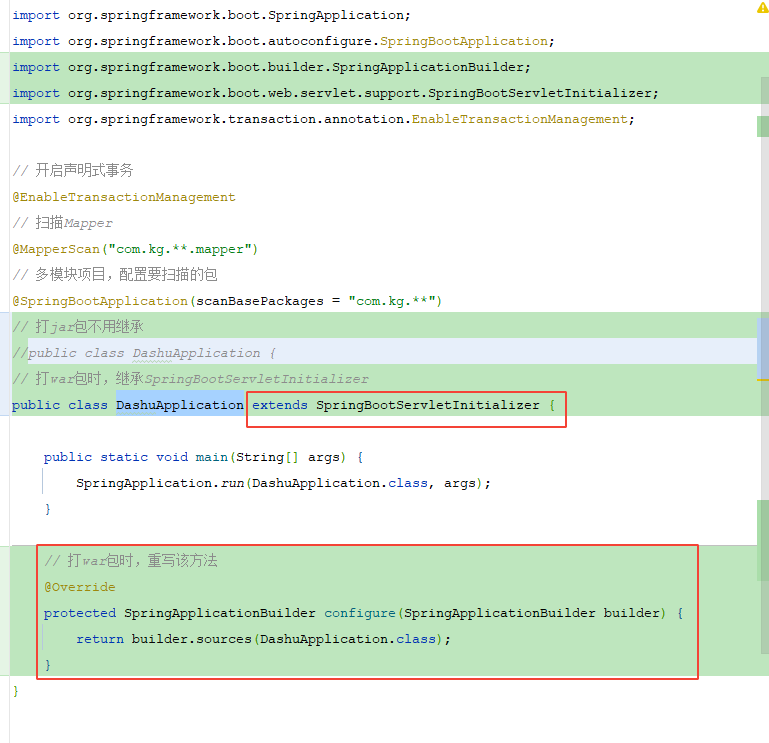
1. 修改启动类
继承 SpringBootServletInitializer 类,并重写 configure 方法。
java
// 打war包时,继承SpringBootServletInitializer
public class DashuApplication extends SpringBootServletInitializer {

    public static void main(String[] args) {
        SpringApplication.run(DashuApplication.class, args);
    }

    // 打war包时,重写该方法
    @Override
    protected SpringApplicationBuilder configure(SpringApplicationBuilder builder) {
        return builder.sources(DashuApplication.class);
    }
}
2. 修改 component 模块的 pom.xml
- 移除打jar包时的,tomcat模块(spring-boot-starter-tomcat依赖)。
- 移除tomcat后,会缺少 javax.servlet-api 依赖,需要添加。
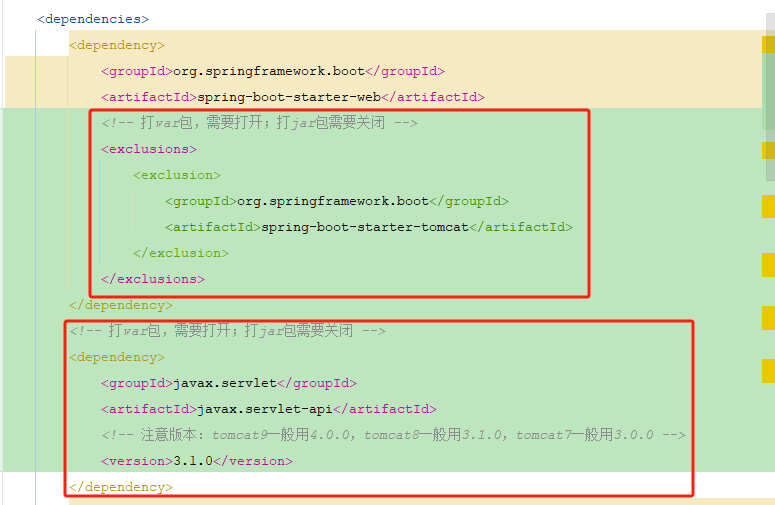
xml
<dependency>
    <groupId>org.springframework.boot</groupId>
    <artifactId>spring-boot-starter-web</artifactId>
    <!-- 打war包,需要打开;打jar包需要关闭 -->
    <exclusions>
        <exclusion>
            <groupId>org.springframework.boot</groupId>
            <artifactId>spring-boot-starter-tomcat</artifactId>
        </exclusion>
    </exclusions>
</dependency>
<!-- 打war包,需要打开;打jar包需要关闭 -->
<dependency>
    <groupId>javax.servlet</groupId>
    <artifactId>javax.servlet-api</artifactId>
    <!-- 注意版本:tomcat9一般用4.0.0,tomcat8一般用3.1.0,tomcat7一般用3.0.0 -->
    <version>3.1.0</version>
</dependency>
3. 修改 core 模块的 pom.xml
- 移除 tomcat-embed-el 的依赖。
- 配置 servlet-api 的版本号(不配置可能被其他依赖的版本号覆盖)。
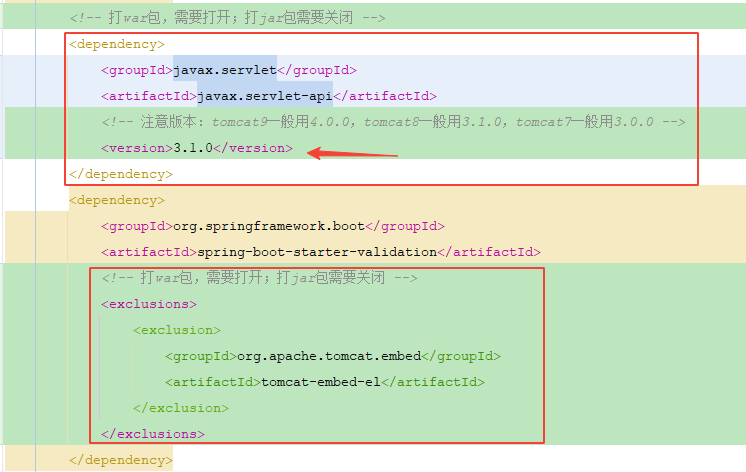
xml
<!-- 打war包,需要打开;打jar包需要关闭 -->
<dependency>
    <groupId>javax.servlet</groupId>
    <artifactId>javax.servlet-api</artifactId>
    <!-- 注意版本:tomcat9一般用4.0.0,tomcat8一般用3.1.0,tomcat7一般用3.0.0 -->
    <version>3.1.0</version>
</dependency>
<dependency>
    <groupId>org.springframework.boot</groupId>
    <artifactId>spring-boot-starter-validation</artifactId>
    <!-- 打war包,需要打开;打jar包需要关闭 -->
    <exclusions>
        <exclusion>
            <groupId>org.apache.tomcat.embed</groupId>
            <artifactId>tomcat-embed-el</artifactId>
        </exclusion>
    </exclusions>
</dependency>
4. 修改 module 的 pom.xml
- 修改打包方式
xml
<packaging>war</packaging>- 配置 servlet-api 的版本号(不配置可能被其他依赖的版本号覆盖)。
xml
<!-- 打war包,需要打开;打jar包需要关闭 -->
<dependency>
    <groupId>javax.servlet</groupId>
    <artifactId>javax.servlet-api</artifactId>
    <!-- 注意版本:tomcat9一般用4.0.0,tomcat8一般用3.1.0,tomcat7一般用3.0.0 -->
    <version>3.1.0</version>
</dependency>- 配置文件扫描配置
- 打war包的plugin配置
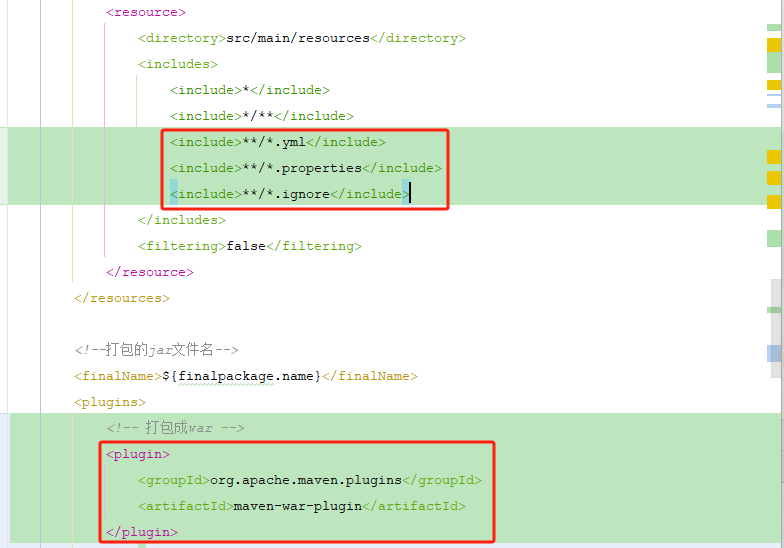
xml
<build>
<resources>
<resource>
<directory>src/main/java</directory>
<includes>
<include>**/*.xml</include>
</includes>
<filtering>true</filtering>
</resource>
<resource>
<directory>src/main/resources</directory>
<includes>
<include>*</include>
<include>*/**</include>
<include>**/*.yml</include>
<include>**/*.properties</include>
<include>**/*.ignore</include>
</includes>
<filtering>false</filtering>
</resource>
</resources>
<plugins>
<!-- 打包成war -->
<plugin>
<groupId>org.apache.maven.plugins</groupId>
<artifactId>maven-war-plugin</artifactId>
</plugin>
</plugins>
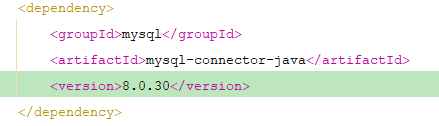
</build>5. 修改 mysql-connector-java 版本号
- 默认的 mysql-connector-java 版本号是低于 v8.0.30 版本的,在tomcat运行会报错。
- 因此改成 >= v8.0.30 版本的,如下图所示。
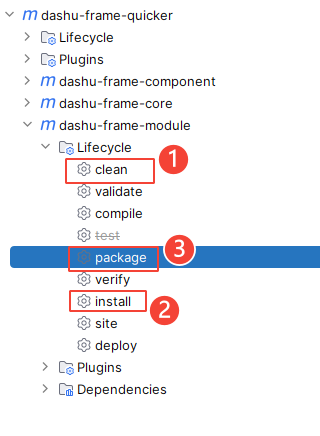
6. 打包
- 运行 mvn clean package 打包
- 打包目录 target/app.war
部署到tomcat测试
- 把war包放到tomcat的webapps目录下
- 启动tomcat